User Interface (UI) Overview
The File Menu
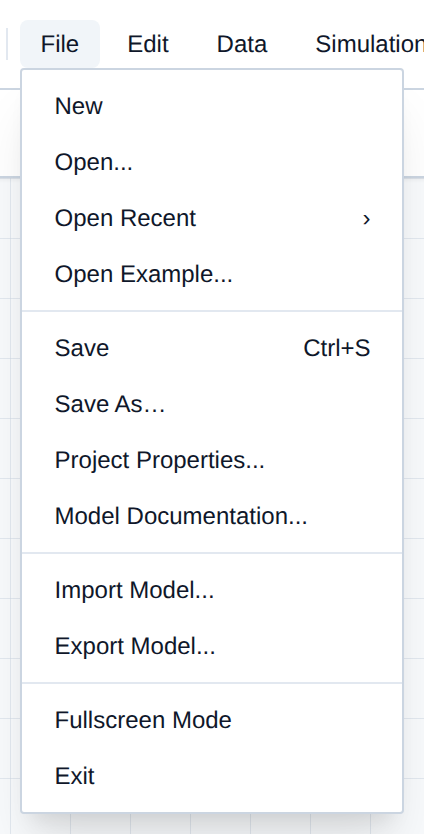
The top navigation bar of the R-THYM editor contains several drop-down menus for managing your project and interacting with the system. The File menu handles saving, loading, and importing/exporting your network data.
Here is a breakdown of every option in the File menu:
- New: Clears the canvas and starts a blank, untitled project. Save first if you have unsaved changes.
- Open...: Opens a dialog of your saved cloud projects so you can load one into the editor.
- Open Recent: Lists the last few projects opened in this browser. Hover and pick one without returning to the Dashboard.
- Open Example...: Takes you to the Example Projects section of the Dashboard so you can load a pre-built benchmark model.
- Save: Commits the current workspace to the cloud. A new or cloned example project will ask for a name. Shortcut: Ctrl+S.
- Save As...: Copies the current workspace into a new cloud project. Use this before making a large change you might want to unwind.
- Project Properties...: Edit the project name and short description stored with the cloud project.
- Model Documentation...: Opens the markdown and LaTeX documentation editor (Editor, Preview, or Split View).
- Import Model...: Choose R-THYM JSON or EPANET
.inpand load that file from your computer onto the canvas. - Export Model...: Download either a full R-THYM JSON archive (power topology, controls, chart settings, and custom properties) or an EPANET-compatible
.inpof the network geometry. - Fullscreen Mode: Expands the editor to fill the browser window.
- Exit: Closes the editor and returns you to the Dashboard.
Updating the project description
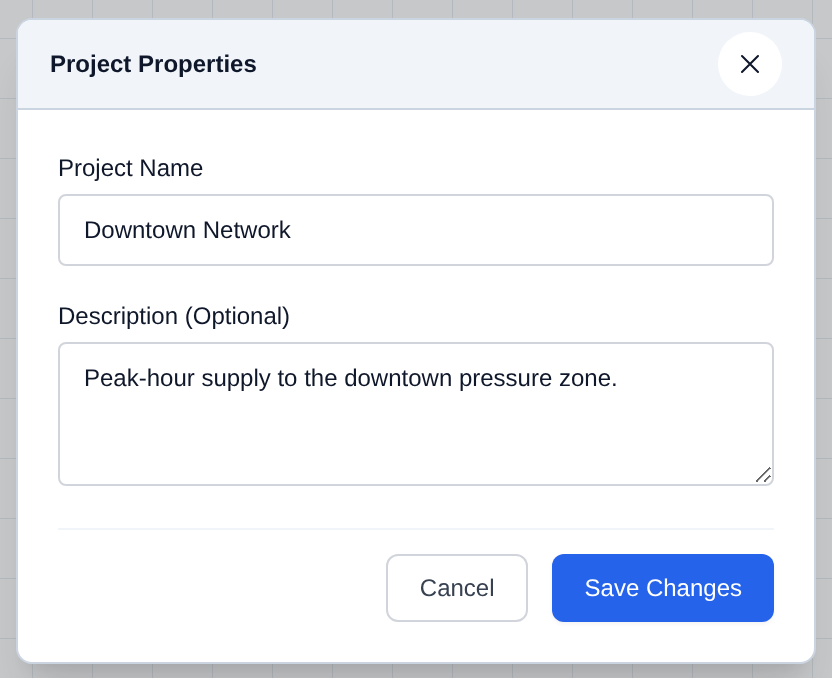
The short description shown on the Dashboard is edited from File → Project Properties.... The project must already be saved; on an unsaved canvas this item asks you to save first.
- Open File and choose Project Properties....
- Edit Project Name if needed.
- Enter or change Description (Optional). This is the short summary stored with the cloud project, not the longer Model Documentation.
- Click Save Changes.
Mastering the File menu keeps your work saved and lets you move models between R-THYM and EPANET when you need to.